Four Easy Easter Crafts and Activities
09 March 2017
Easter’s around the corner so what better way to celebrate the start of the new season than to get the craftbox out with the kids and get messy and creative?
There is lots of inspiration out there, so thanks to Pinterest we’re going to outline some easy craft things to make and do with kids this Easter.
Word of warning: some of these will be messy - so be prepared!
Easter crafts for 2-4 year olds

Courtesy of Chickabug
Little ones love getting messy, and fingerprinting is the ideal way of allowing them to have fun, without the inevitable carnage that can follow when a toddler is let loose with poster paints!
This card is adorable and can be made for friends and family. Little ones will like making the noise of the various animals, and the older ones can draw faces on the thumbprints.
You will need:
- Card, of any size
- Poster paints in yellow plus a colour of your choice
- A black medium nib marker
Method:
- Simply paint your kid’s thumb or finger with the paint and press down on the card.
- Once dry, turn the coloured blobs into animals with the black marker.
- Mount it on some card, and voila, homemade Easter cards!
Easter crafts for 4-6 year olds

Courtesy of Kids Craft Room
If you have an egg hunt planned this Easter, these little cones will be a handy accessory in scooping as much loot as possible. They are really easy to make and just require card, scissors and tape. You can even treat them to some mini chocolate eggs when they’re completed!
You will need:
- Orange card – (cut into quarter circle shapes as large as possible on one sheet)
- Green card
- Scissors
- Glue or sticky tape
- Choccie eggs to put inside
Method:
- Roll the card into a cone shape.
- Cut out the green card to make the carrot top.
- Secure the carrot and top with glue or sticky tape.
- Fill with eggs and use them at your next egg hunt!
Easter crafts for 6-8 year olds

Courtesy Crafty Morning
As they get older, children really love spending a couple of hours in the kitchen creating something yummy. These Rice Krispies nests are perfect for little hands to make – and knowing they’ll be able to eat the things at the end will spur them on to do a good job. Whether or not they’ll help tidy up at the end is another matter!
Recipe:
- 3 tbsp butter
- 1 x 10oz bag of marshmallows
- 6 cups of Rice Krispies
- Chocolate mini eggs
Method:
- Melt the butter in a warm pan and then stir in the marshmallows.
- Keep stirring until they are melted and then pour the mixture into the Rice Krispies.
- Grease a muffin tin and shape the Rice Krispies mixture into nests in each individual compartment.
- Pop in the fridge and leave to cool and harden for an hour.
- Take out and fill each nest with chocolate eggs – and enjoy over a cup of tea!
Easter crafts for 8-10 year olds

Courtesy of Typically Simple
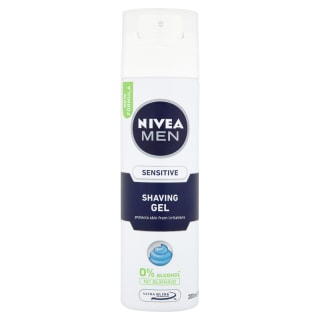
We love these, and older kids will enjoy the amount of messiness involved to create something that looks quite intricate. Marbling with shaving cream and paint isn’t as difficult as it sounds with the right kit - and perhaps a protective plastic table cloth underneath, just in case!
You’ll need:
- Shaving cream
- Card cut into egg shapes
- Acrylic paint
- Tray or box lid
- Paintbrush, toothpick, or fork
- Newspapers & paper towels
- Scraper tool
Prepare for a little bit of mess here – but trust us, it’s lots of fun!
Method:
- Get the tray and spray full with shaving cream. Get help with spreading it evenly on the tray.
- Next, squirt blobs of paint onto the shaving cream. Let the children choose what colours to use and where to place them – they can do zig-zags, spots, squiggles – it's up to them!

3. Using a toothpick, or something else pointy, make horizontal lines across the shaving cream with it. Once done, repeat the same process but this time using vertical lines. The marble look should be beginning to show.
4. Take the paper egg and place on top of the shaving cream – press down slightly, and then pull it off and leave on the newspaper to dry for a few minutes.
5. Using a scraper tool (an old bit of card will do), scrape off the shaving cream, and the paint will remain on the paper egg.
6. Once dried, you should see your marbled egg in all its glory. Attach to some twine and hang up on the wall or over doorways like bunting.
We love coming up with cheap craft projects for Easter and focusing on bunnies, eggs, carrots, flowers and chicks – but if you’ve come up with anything seasonal and crafty, share your pictures with us on Facebook, Instagram and Twitter and join the B&M community!


